An A75 for NX41CC
An A75 Engine for NX41CC
Updated September 7, 2009- test time flown off!
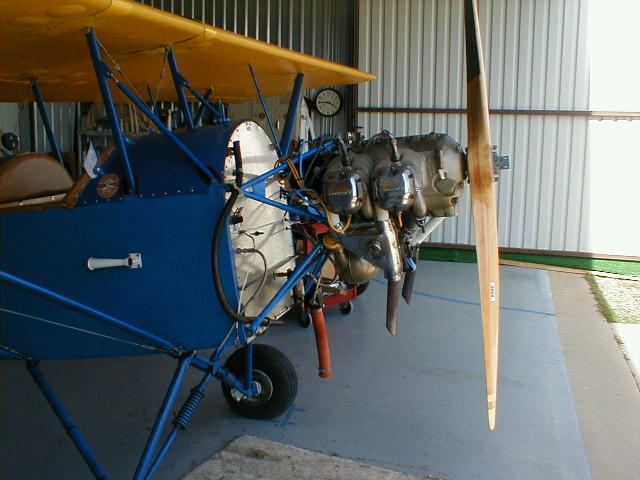 This is the A65 engine on 41CC. Very ordinary installation, very common accessories as used on many Piets. The engine has just a hair over 100 hrs. since major overhaul so it was really just broken in. Runs great, starts easily, and with the Hegy 72x42 prop on it, the Piet performs very nicely. However, when it's hot around here (and that means most of the time) and when I have full fuel and a passenger, the climb performance is nothing to brag about. So when I had the opportunity to get an A75 and ten more horsepower, I took it. In this picture, I've just disconnected all the hoses, wires, and accessories from the 65 and it's ready to lift off the engine mount.
 I found this core engine in a garage and bought it from the widow of the owner. Condition was unknown, no logbooks, no idea what it really was although rumor had it that the owner said it was flight-ready and had been converted from an A65 to an A75 already. Engine dataplate didn't say so (it was all but unreadable) so I bought it for the price of a core and assumed that I'd need to do a complete conversion and overhaul. That's exactly what happened.
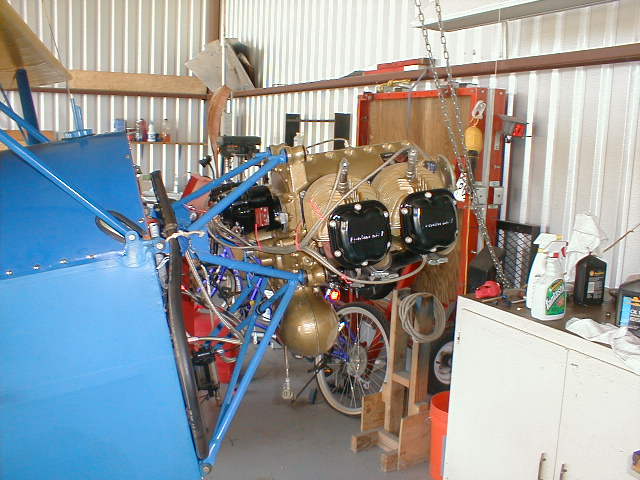
 Here's what the engine looked like after Jeff Scott and Doug Reid got finished with it. The basic engine cases, crank, and cylinders were found to be in fairly good overall condition and indeed the connecting rod ends had been drilled with additional oil holes as required for an A75, but nothing else indicated that it had been properly converted and in fact it needed lots of work.
Jeff, an A&P, completely overhauled the engine in accordance with Continental's overhaul manual. The crank was magnafluxed, ground to .010" under on the main and rod journals, and it was balanced and nitrided. The back of the prop flange and front seal area were reground and cad plated. All crank, cam, and cam follower measurements now meet "new" standards.
The cam followers were replaced with new ones since the old ones were pitted beyond serviceability. The hydraulic lifters were overhauled. The oil pressure relief spring and plunger were replaced with new. The cylinders were found to be .015" overbore and were in generally good condition. They were cleaned, bores honed, new valve guides installed, valves and seats ground and valves installed with all new springs. New .015" oversize pistons were installed with new rings, new wrist pins, new pin plugs, and the connecting rods were match-balanced end for end.
Every nut, bolt, and washer in the engine was replaced with new and matching pieces with the exception of the cam gear and crank gear mounting bolts. All gaskets were replaced. The engine cases and covers were completely cleaned and stripped and new paint applied when the engine was complete. Mis-matched valve rocker covers were replaced with a matched set which were cleaned and repainted.
The magnetos were replaced with new impulse-coupled Unison Slick mags with new drive gears, new shielded harnesses, and new Unison REM40E massive electrode plugs. I also overhauled the Stromberg NA-S3A1 mixture-controllable carb for installation on the engine.
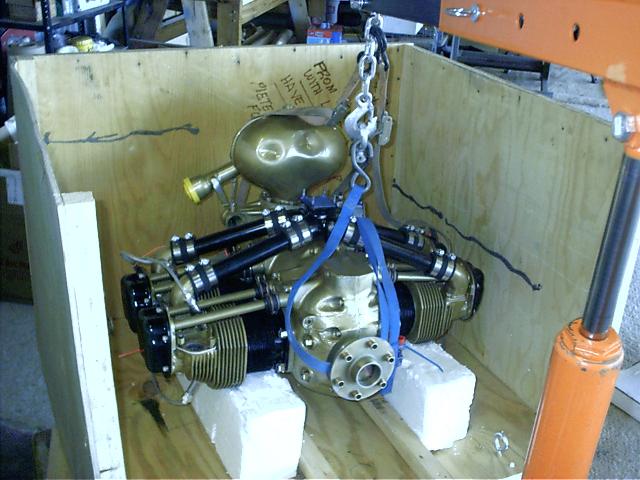 Engine going in the crate in New Mexico, for shipment back to me in Texas. I elected not to mess with trying to remove the dents from the oil sump. They don't affect performance.
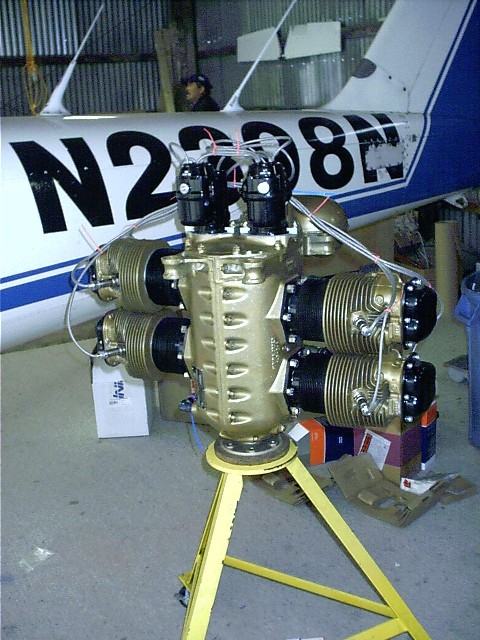
 So back to the story. Here's the A65 disconnected and off the airplane. The 65 has a taper shaft hub for the Hegy prop; no drive lugs. New engine is sitting on foam blocks on the floor, straining at the leash that is holding it :o)
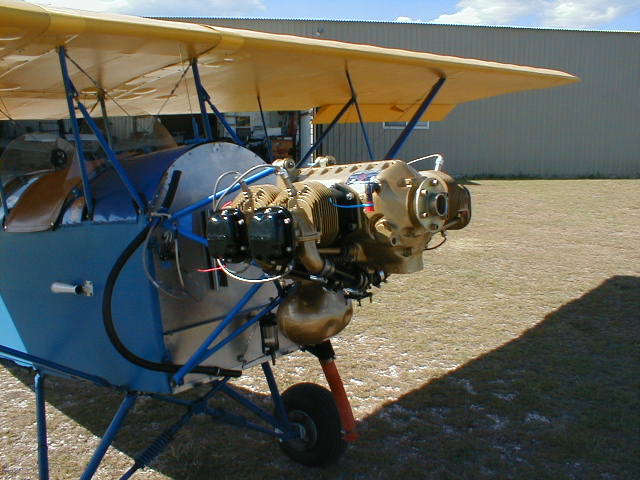
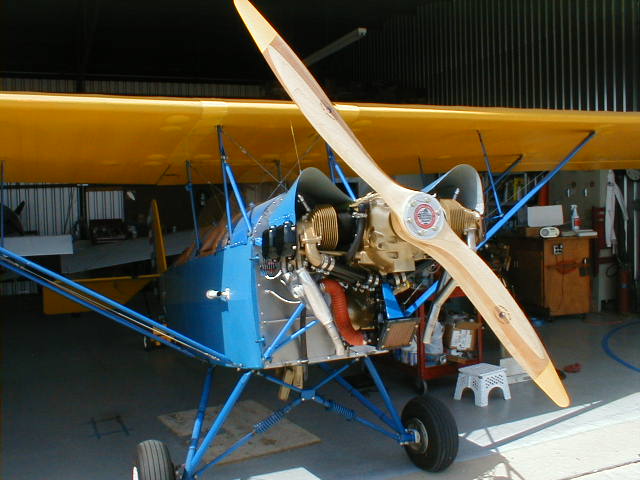
 And here's the A75 mounted to the airframe, slick as a whistle. No systems connected yet, but so far so good.
 Another view of the A75 in its new home. This engine has a flange type prop hub with drive lugs. Bright colored zip-ties with long tails are only temporary, for shipping only, the bright color a reminder to remove them and install the permanent hose or fitting. The fat black hose is the engine crankcase breather, tied out of the way for the moment.
Sharp eyes will notice a vertical piece of unistrut on the firewall that isn't in the first picture when the 65 was still on the airplane. That piece of strut is the mount for the smoke oil tank, which is not yet in place in this photo. Also still to come are the new stainless steel exhaust stacks, mixture-controllable Stromberg carb, and a firewall-mounted sealed-cell UPS battery that will be used to power the smoke system, my GPSMap, and the Sigtronics intercom that keeps using up 9V batteries. A trickle charger will keep the new battery at full charge between flights.
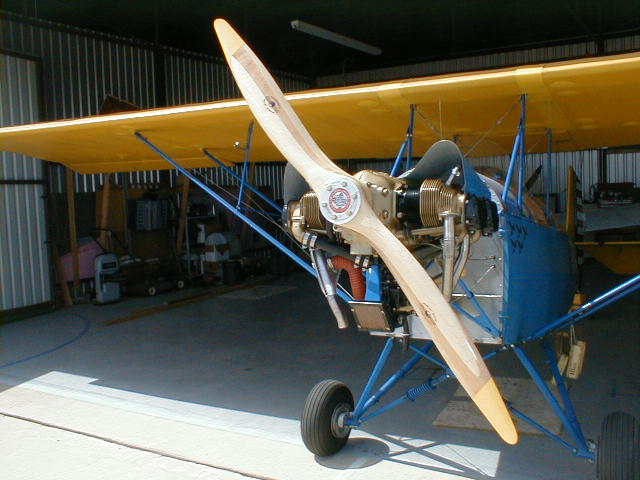
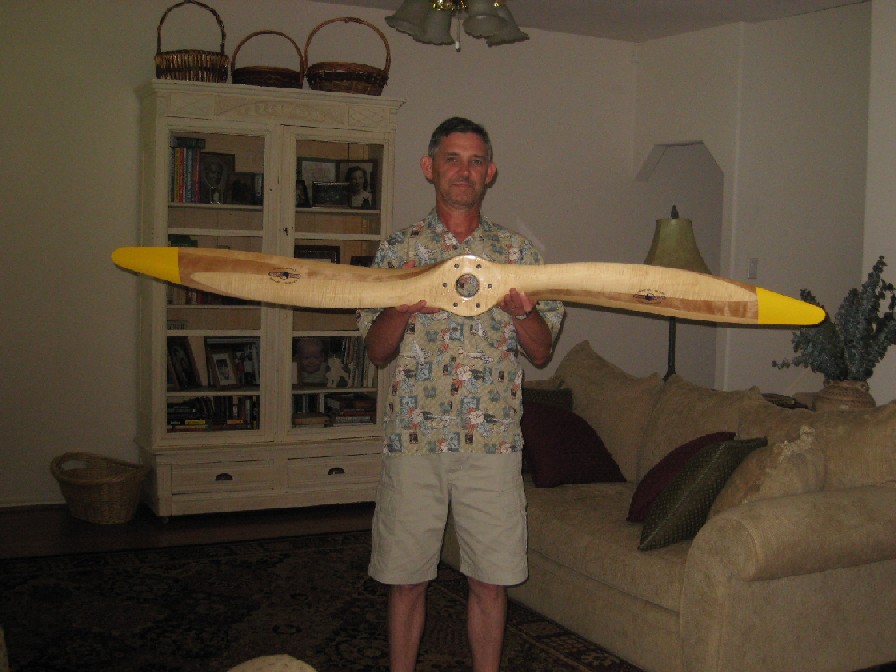 Here's the new Culver 72x36 prop for the A75. It should allow the engine to turn the 2600 RPM necessary for full rated power. Bolt holes on the side facing me are counterbored for the drive lugs.
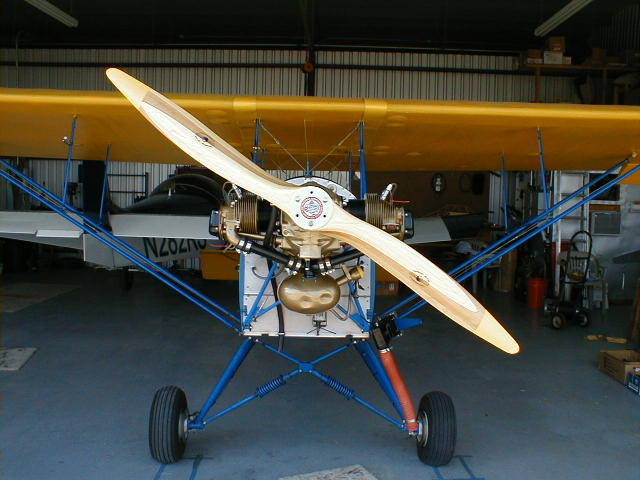 June 28, 2009- And here's the prop fitted to the hub so I could measure for the proper length prop bolts. Note the authentic replica Continental Motors logo plate on the front, over the crush plate. It's from Wag-Aero and isn't all that great but I thought it would add a nice touch. I couldn't use it with the taper shaft hub since the nose of that hub sticks out the front of the crush plate. The other little detail that I had forgotten about until I hung the engine is that the oil filler neck on this engine is on the opposite side from the one on the A65, so I'll have to do some trimming on the lower cowl to provide access. Oh, and I also found a crack on one of the cooling eyebrow mounting plates so I'll have to fabricate a new one. Sigh. Did I say I like building more than I do flying? Then why am I so anxious to quit fiddling with this engine and get back in the air? ;o)
 July 27, 2009-
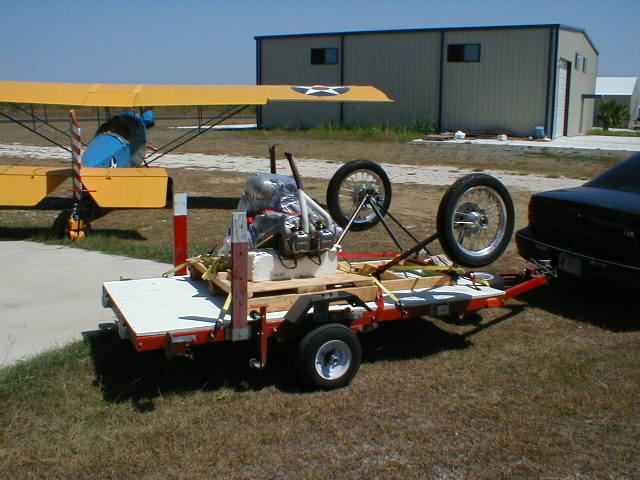
Saying goodbye to my old 65. It's on its way back to Corky, perhaps to fly another day on a new Piet. Also on the trailer is the set of landing gear that I bought from Arlene Walsh's estate. The gear was intended for Arlene's Aerial biplane and is beautifully constructed. Corky will use the gear to fit up his new Piet and will need to lengthen the shock struts a bit to accommodate a wider fuselage since these are set up for a standard width fuselage.
July 27, 2009-
Saying goodbye to my old 65. It's on its way back to Corky, perhaps to fly another day on a new Piet. Also on the trailer is the set of landing gear that I bought from Arlene Walsh's estate. The gear was intended for Arlene's Aerial biplane and is beautifully constructed. Corky will use the gear to fit up his new Piet and will need to lengthen the shock struts a bit to accommodate a wider fuselage since these are set up for a standard width fuselage.
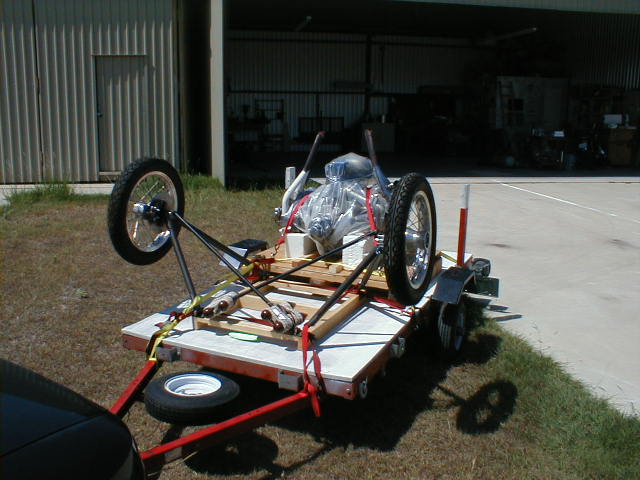 Bye-bye, reliable old friend...
 August 1, 2009-
Here's how the engine looked just prior to first start attempts. New stainless exhaust stacks in place (although I stripped out one exhaust stud and will need to helicoil it), new exhaust heat muff, overhauled Stromberg carb, everything connected and ready.
August 1, 2009-
Here's how the engine looked just prior to first start attempts. New stainless exhaust stacks in place (although I stripped out one exhaust stud and will need to helicoil it), new exhaust heat muff, overhauled Stromberg carb, everything connected and ready.
 After letting the prop sit for a week with the bolts torqued to spec (15-18 lb-ft), I backed them off and let the wood rest while I worked on other things, then went back and retorqued them and safety wired. Then I remembered to check prop tracking and found one blade out by about 3/32" but decided to let it ride while I did ground tests. Good thing, because during my attempts to prop start the engine, I wore myself out due to the prop being out of "clock" by one bolt, which meant that the down blade was at the 8 o'clock position at compression rather than at the 10 o'clock position, giving me bad leverage on the start. Now I have a good reason to cut the safety wire, reclock the prop, retorque the bolts and correct the tracking, THEN safety the bolt heads. This is how we learn, and how muscles get sore ;o)
The engine finally started when I realized that I needed to have the throttle just a tad off the stop or the engine would not get enough fuel. Once it started, the oil pressure came up instantly and eased up to the top of the green, which was higher than I had ever seen with the 65. Everything stabilized, the engine ran strong and clean, and as Jeff had instructed me I did a conventional check and runup, mag drops and carb heat drop were good, and he told me to run it no more than 5-10 minutes to check for leaks and any other problems. Good thing, because I noticed that it was starting to drip oil from somewhere right above the carb air box so I shut it down and put it away to cool off. Now for the oil leak.
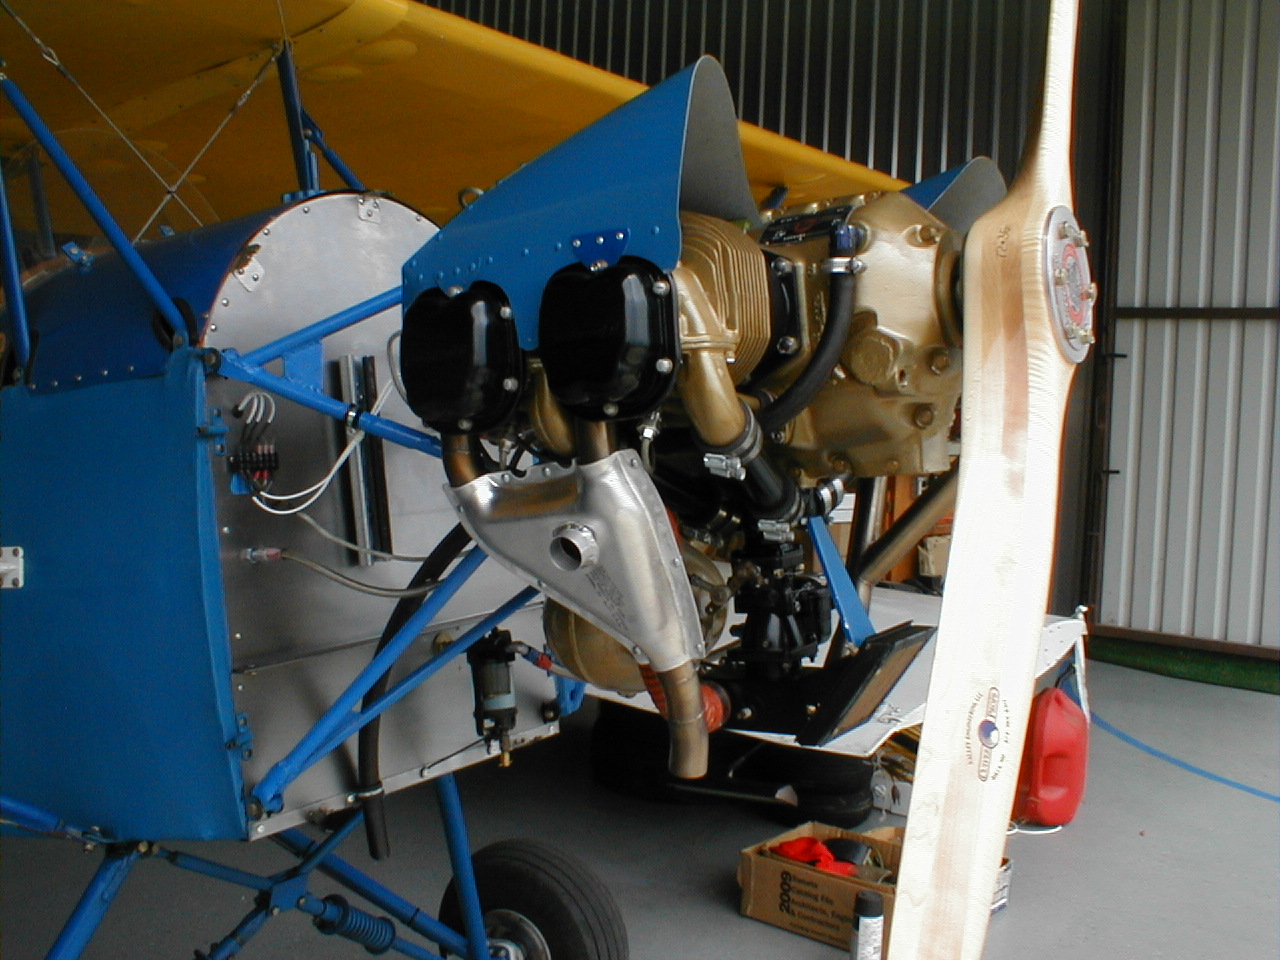
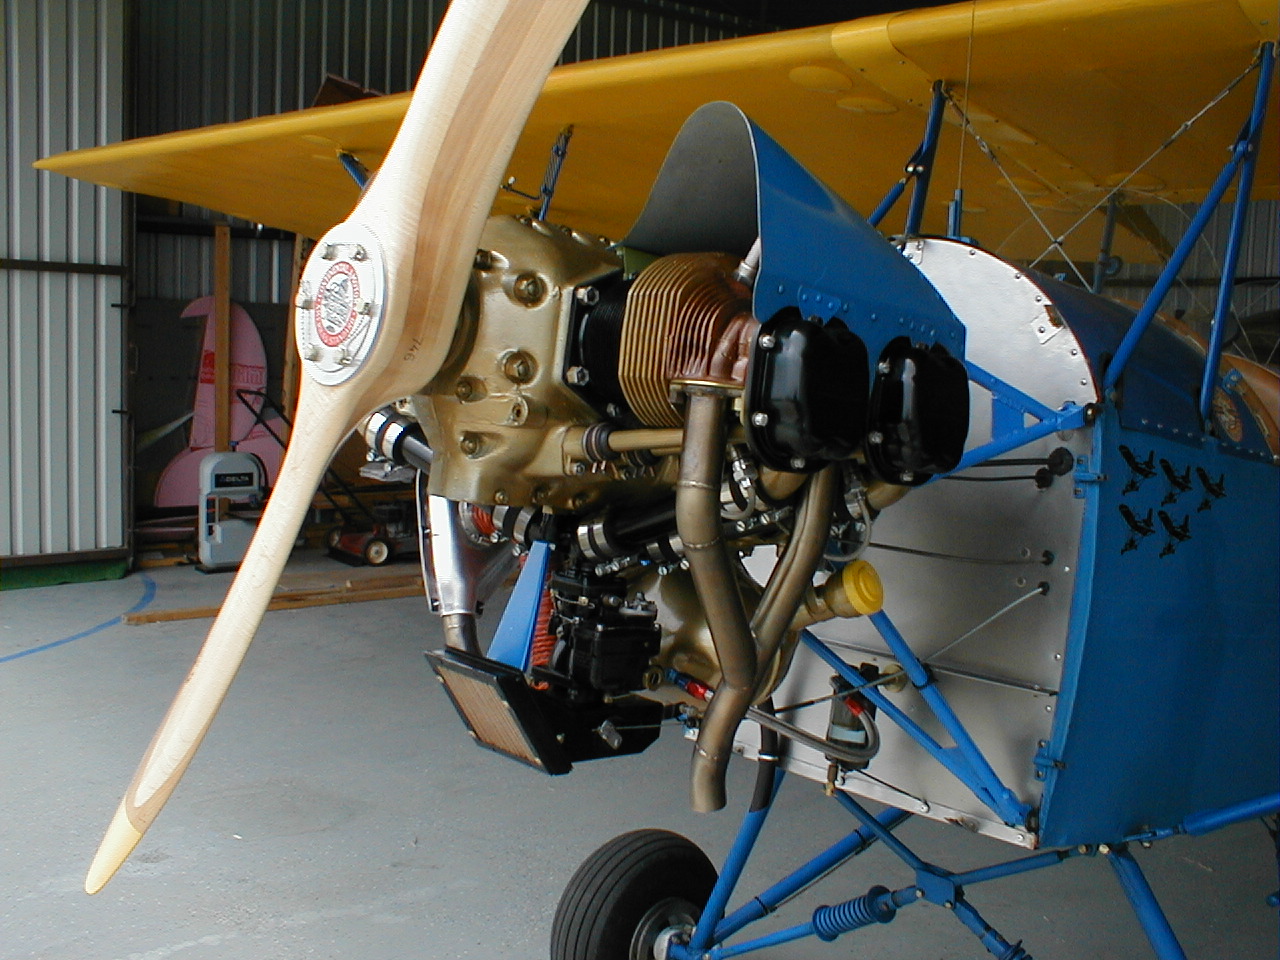 Here are a couple of shots of the completed installation, left and right.
 I helicoiled the exhaust stud, repaired the oil leak (one of the oil gallery plugs), put rubber caps on the magneto P-lead connections, installed a Curtis quick-drain on the oil sump, safetied everything, and the engine flew off its required test hours with no further problems. I did experience carb icing one morning after taxiing to the end of the runway and then having the engine falter and stumble when power was applied, but that's a characteristic of these carbs and I'll remember to apply carb heat anytime the engine is operated below about 1700 RPM from now on. It runs strong, smooth, oil consumption is very low, oil pressure is very strong, and fuel consumption seems to be about the same as with the 65... about 4 gal./hr.
Let's go fly!!!