Wood Framing


Wood framing of the kayak

Created June 4, 2014

Updated with completion of first set of frames June 8, 2014

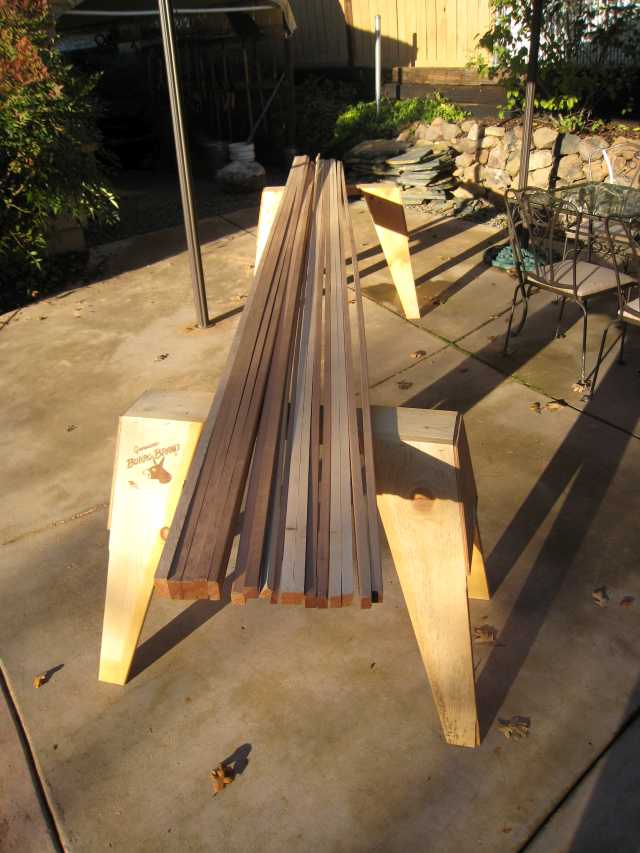
Updated with cutting of stringers November 15, 2014

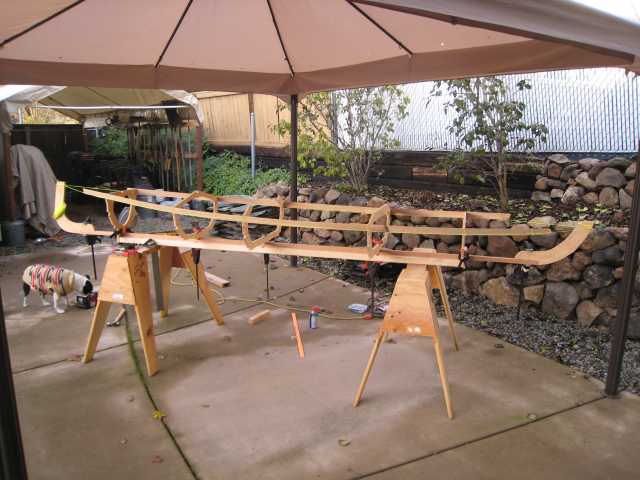
Updated with keel and frames November 23, 2014

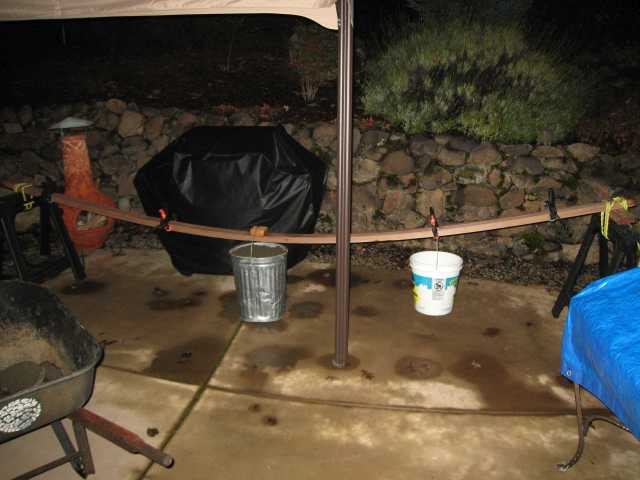
Updated with gunwale bending November 29, 2014


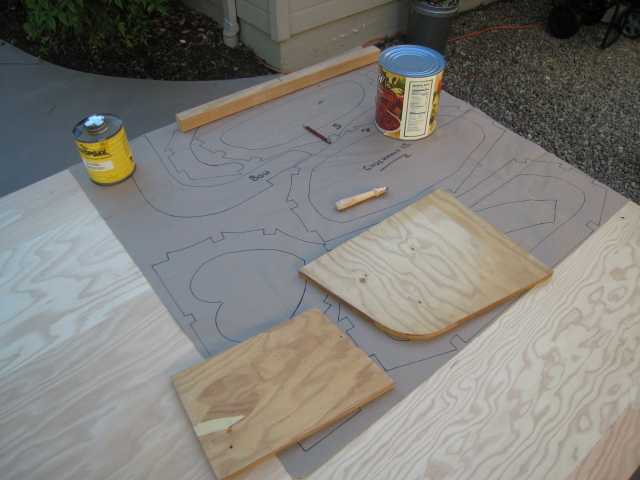
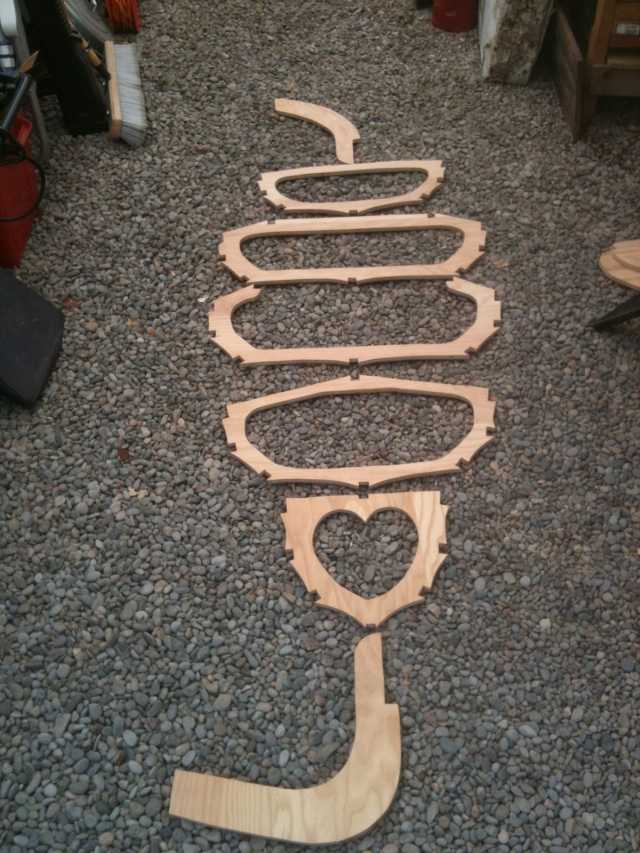
This is where it starts. I've started laying out the frames, stem, and stern on 1/2" marine plywood. My technique was to use a sewing pattern tracer, which is sort of like a miniature pizza cutter with a spiked wheel. Tracing over the lines of the pattern leaves a string of small holes in the wood underneath, which are then connected with a pencil line for cutting. The cutting of the plywood pieces is done with jigsaw, bandsaw, and whatever else is needed to cut out the corners and curves. A really patient person could possibly do it all with a coping saw, but that would take quite a long time! The perfect way to while away the days if you were Robinson Crusoe on a desert island (and had plenty of spare blades for your saw).

This was what my first set of frames looks like. I wasn't real happy with the chipping that happened here and there as the jigsaw made its way through the plywood, but I didn't want to bother with putting tape down on the wood or doubling it. Too much work ;o) These will get cleaned up on the drum sander and get the inside edges eased, then I'll use them as templates to lay out the second set of frames. Once that's done, I'll drill holes for the sinew lashing and set up the strongback.

Here are the stringers for my two kayaks, all ripped from two 15 foot Western red cedar planks. There are some spare/extra pieces in this stack, and one or two pieces that have knots so they will either need to have the knots cut out and then scarfed back together, or I'll use them for trim pieces. Ripping the planks is best done with two people and a table saw. We made quite a pile of cedar sawdust cutting all these pieces.

The strongback is a straight 2x4 screwed to a couple of sawhorses, and the keel is now centered on the strongback and secured. I couldn't stand it, so I temporarily clamped the frames and stems in their places along the keel and strongback and then faked in the gunwale lines using some scrap strips of wood and twine. After I marked the frame locations on the strongback, I heard back from Dave Gentry that he has made some adjustments to the locations to help the cockpit fair, so I changed the locations and marked them again. The new locations move the kayaker's center of mass almost 9" forward from where it was before, and it changes the sheer line of the gunwales from the front of the cockpit to the forward stem. The photos show the frames in the previous location. I was really stoked to see it starting to take shape, although it all needs to come back apart (except the keel on the strongback) so I can finish sand the frames, lay out and cut the set of frames for the other kayak, and start soaking and bending the gunwales so they can be put in place. That should be interesting.

The building tips and directions for building the kayak say to soak the gunwales for at least a day. In Oregon, all you have to do is place them outdoors to soak them ;o)

I soaked the gunwales a day and a half and then set up the bending jig. Since I have two sets to bend (4 gunwales), it was a stout bundle of wood and I needed to use more weight than if I were just bending two gunwales. In the middle I have a 10 gallon garbage can full of wet sand (about 150 lbs), and I added a bucket with 5 gallons (40 lbs) of water up towards the bow end to help them out a little bit more where I thought they might need it. They're taking a pretty good set and will stay like this a day or two. I must say that I had a devil of a time setting this whole thing up, because the boards want to flip over onto their sides and if you don't use plenty of clamps, they will slide along each other and really get away from you.

Another view of the bending setup. Even soaked, the bundle of gunwales was plenty resistant to being bent 'vertically' and I had to secure everything to keep the whole thing from springing apart.