Tail Hinges

Welcome to Rogue Air Parts! The following is a description of how the "Vi Kapler style" tail hinges are fabricated.
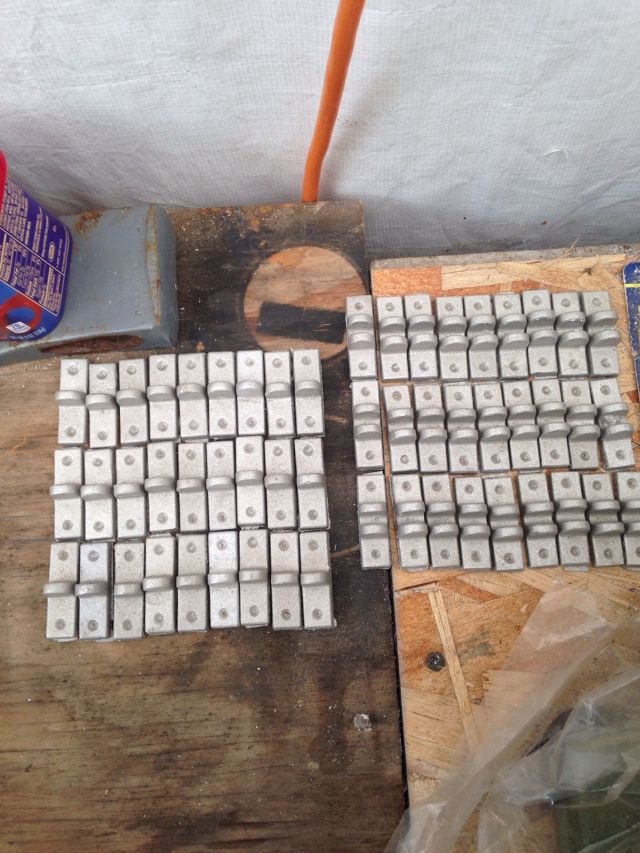 Above are three sets of 9 pairs of hinges... enough for three Air Campers. Although they look simple and somewhat crude when compared to injection-molded reinforced plastic parts or parts that have been CNC machined from solid stock, these cast aluminum hinges are more than adequate for the loads that they encounter on the tail of an Air Camper or similar experimental aircraft. They have been time-tested over hundreds of flight hours and several decades since Vitalis "Vi" Kapler first came up with the tooling and blanks to make them. The process of converting rough cast parts into hinges that are ready to be finished and fitted by the builder is simple and straightforward, but is somewhat time-consuming and requires hundreds of separate hand operations for a complete set of hinge parts. There are just a few simple jigs used in the preparation.
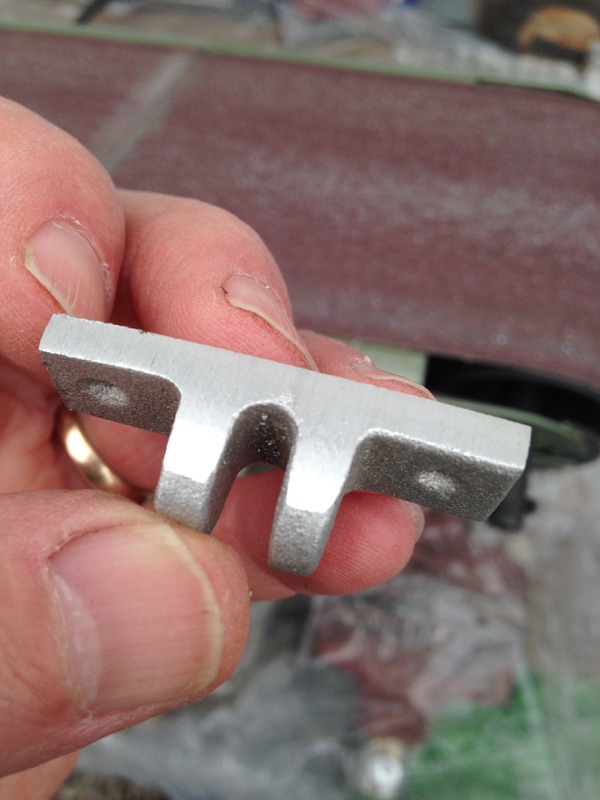
The starting point for a set of hinges is a pair of cast aluminum parts, one with a single ear and the other with two ears that mate with it. An AN393 (MS20392) clevis pin with thin AN960 washer and AN380 (MS24665) cotter pin are also required for each set but do not come with the hinges. Nine pairs of hinges, 18 individual pieces (a set of three pairs of hinges per tail surface) comprise a complete set of tail surface hinges for the Pietenpol Air Camper. These 18 pieces require quite a number of separate manual operations to get from rough castings to builder-ready parts. It's pretty old-fashioned, and no two parts will ever be alike but the essential operations are done using jigs that go back to Vi's original development of the parts. I have included Vi's handwritten fabrication notes in the photos where they apply, on index cards just as I received them from him when I bought out his parts and jigs.
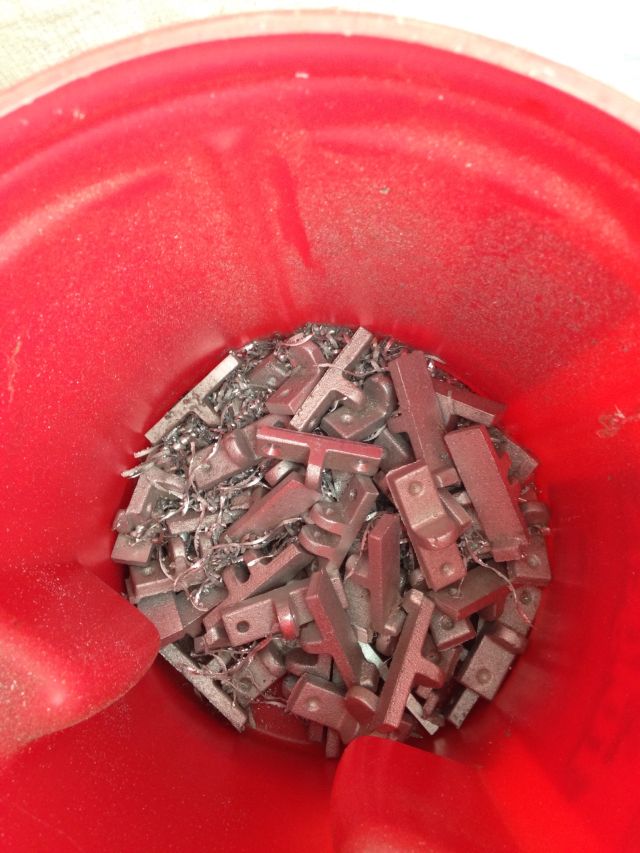 The first step is to examine the rough castings, because not all of them are suitable to make into aircraft parts. The nature of the casting process leads to voids, imperfections, and incomplete filling of the molds from time to time. While some of the imperfections are very minor and cosmetic, others are cause for immediate rejection as being unairworthy before even beginning the finishing process. Load testing of sample parts has confirmed that the weakest place in the hinge assembly is at the thinnest part of the hinge half with a single ear, since the half with two ears has twice the amount of material to take the load. Any defect or flaw in the single ear casting is cause for immediate rejection. Note the parts in the reject/scrap can above, such as the part at the near 3 o'clock position and another at roughly the 11 o'clock position in the coffee can. All of the rough castings include a casting sprue where the molten metal fills the pouring cavity (the rectangular tab sticking out of the bottom of the piece at the far 3 o'clock in the picture). Also, the castings have slightly sloping sides so that they will release from the mold easier, and these sloping edges need to be squared up in the finishing process. The visual inspections of the 18 pieces are the first 18 hand operations involved in the process.
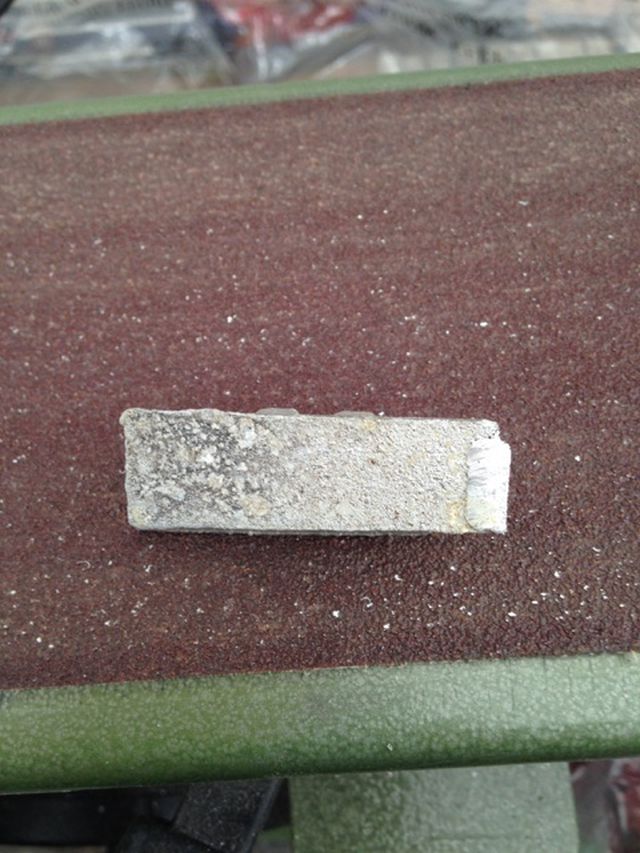
Once the rough castings have passed the first visual inspection, the casting sprues are cut off with a bandsaw or jigsaw, producing parts that are ready for finishing. 18 more hand operations.
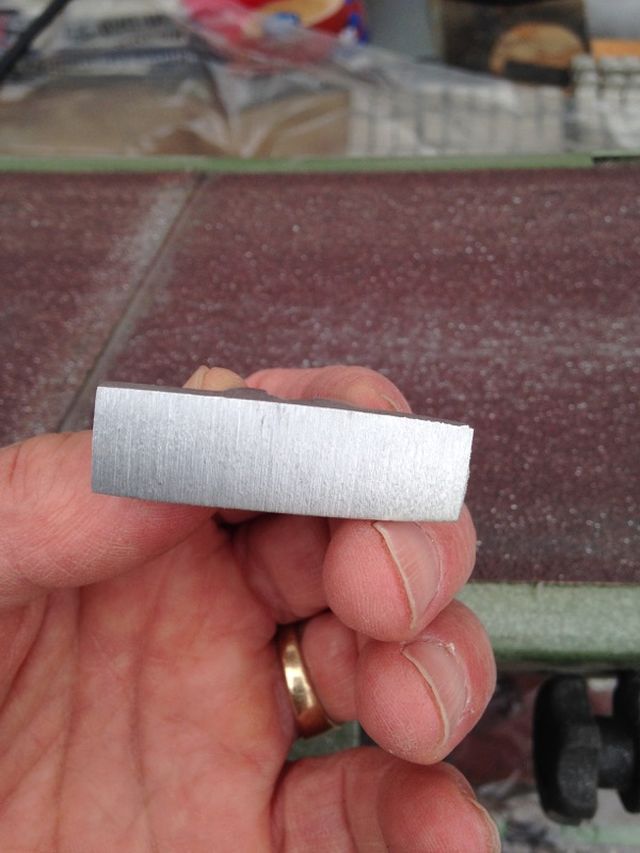
 The belt/disc sander cleans up the rough-cast bottom of the part, which then provides a clean and flat base from which to shape the sides and top, and which also provides registration for the mounting holes and the hinge pivot holes.
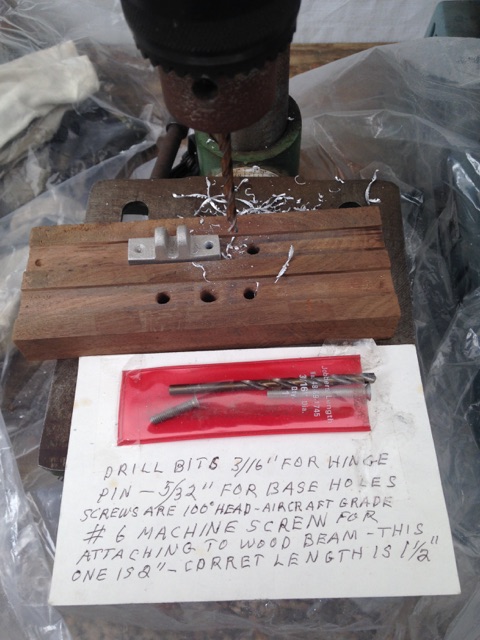
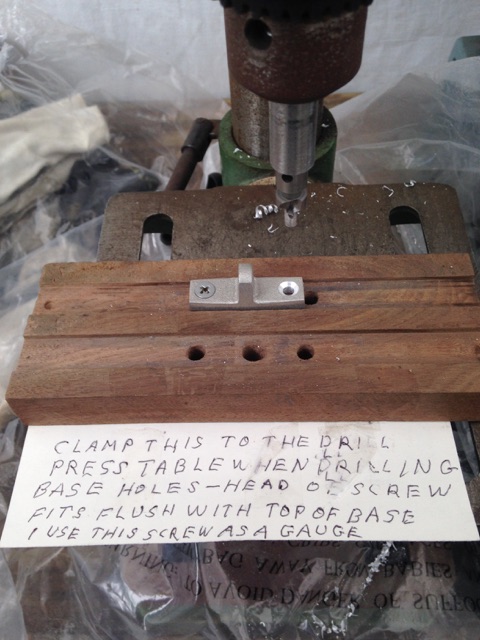
 Once the bottom is flat and the sides are square (another 90 hand operations for a set of hinges), the mounting holes are drilled and countersunk for the MS24693 (#6) machine screws which mount the parts to the tail surface spars. Dimples cast into the parts provide piloting for drilling the mounting holes, although the hole spacing is only approximate and the builder is cautioned to use the actual individual part to locate the mounting holes in the spars and not to rely on a dimension. Drilling, countersinking, and deburring the mounting holes add another 108 hand operations.
Sides:
 Base holes:
 Countersinking:
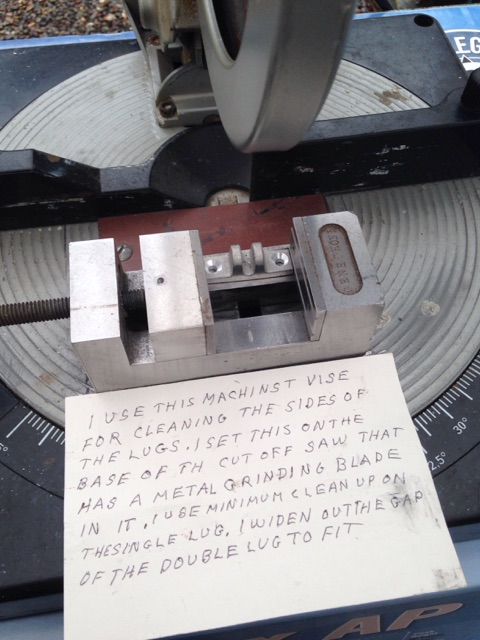
 After the mounting holes are made, the faces of the ears are cleaned and squared in preparation for drilling the pivot holes. Cleanup of the faces is only approximate, leaving the builder to finish them to the degree of fit desired. The more material that is left on the single-ear hinge half, the stronger the hinge will be, so that step is left to the builder to determine. Some builders prefer to have tightly-fitted hinges with precise clean edges, but the parts have served many builders over many flight hours with only a modest amount of fitting and finishing.
Cleaning up the faces of the hinge tabs, another 108 operations:
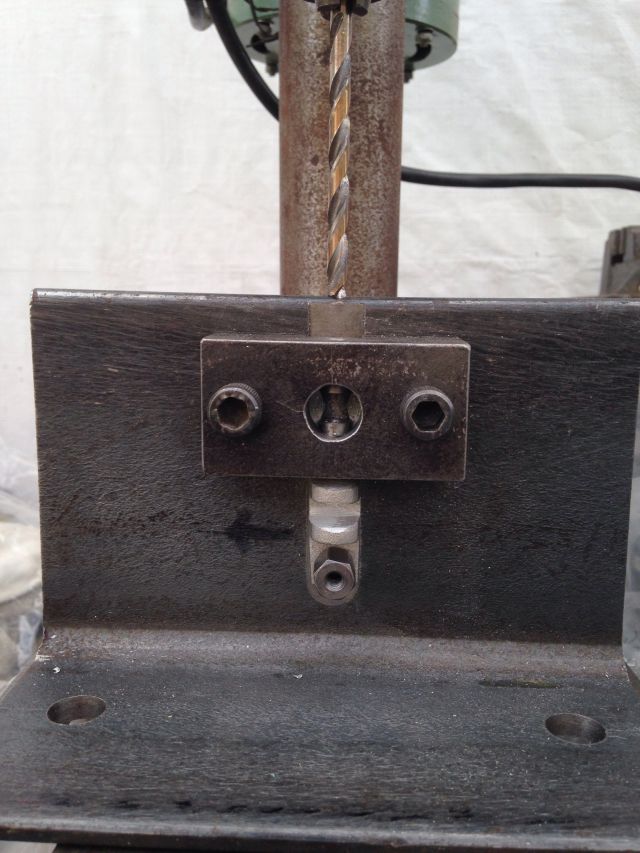
 The final step before cleaning, deburring the holes, smoothing the faces and edges, and final inspection for fit and finish is to drill the pivot holes. Although there is a jig to hold the parts in their proper position, it is important that the outer faces of the hinge tabs be finished nearly square before drilling or the bit will tend to 'walk' and the holes may not be exactly aligned.
Drilling the pivot holes, 54 hand operations including deburring:
... and here, after some 396 separate hand operations, is a pair of hinges. Approximate weight of this pair of hinges, minus the mounting screws and pivot pin hardware, is 0.64 oz, or about 0.38 lb for the complete set of 9 pairs. Since all of this weight is aft of the CG and on a very long moment arm, keeping these parts light is important. Believe it or not, the moment created by this 1/3 of a pound for a set of hinge castings out at the tail of my Air Camper is the same as that created by 3 gallons of fuel (18 lbs) in the nose tank. Use thin AN washers on the clevis pins, don't use pins that are any longer than necessary, and clip the excess leg lengths off the cotter pins before setting them.
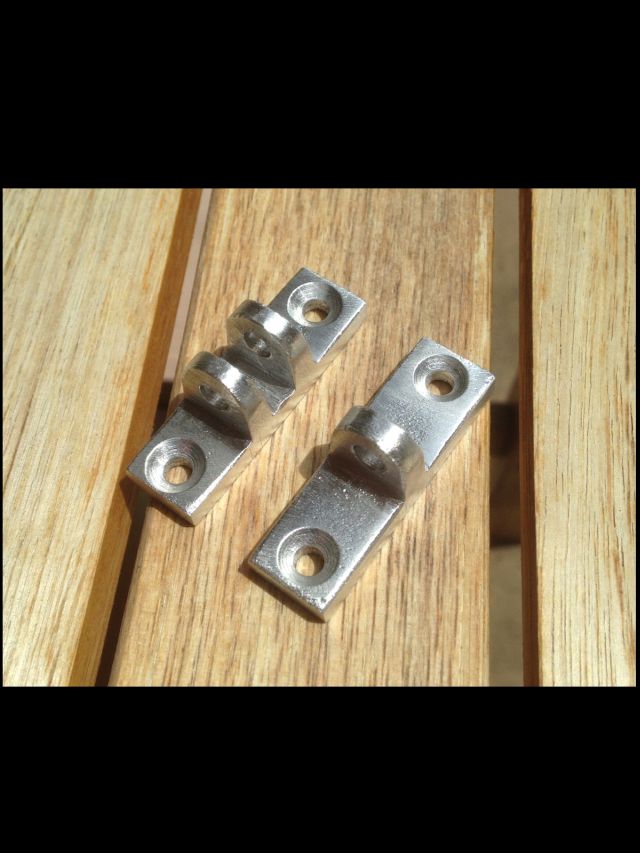 Aluminum "Vi Kapler style" hinge pairs as used on the Pietenpol tail surfaces and some W.A.R. Replica experimentals. The set above has a wider (custom) hole spacing, thus the countersunk areas are closer to the edges than on a normal set.
Rogue Air Parts
4118 Hemlock Drive
Medford, OR 97504
Call or text (210)621-4729, Oscar Zuniga
email taildrags@hotmail.com
This page was modified May 30, 2016